Instructions
What You Will Need
- 1 Arduino Nano (the brain of the finger, this is where the code will be sent and the extensions will receive instructions from)
- 1 thinkershield to attach to our arduino nano (this is optional but recommeneded for beginners)
- 1 Flex sensor (to replicate the bending of one finger, on the bionic one)
- 1 Micro servo (to aid the bionic finger in bending, this will be the main part that helps it bend)
- 1 Hot glue gun (to glue everything together)
- 1 USB cable (to plug your arduino into your computer to send the code to the arduino)
- 1 Thin block of wood (to stick everything on)
- The arduino coding program downloaded on your computer. Click here to access the arduino website for help.
If using a 3D printed finger:
- 3 3D printed finger parts
- 1 metre of fisherman's wire
- 1 1cm x 20cm piece transparent overhead plastic (you can cut this size yourself out of a larger sheet)
If you do not have access to a 3D printed finger, follow instructions here to make this simple straw one.
If you are not able to get on or two of these products head to the troubleshooting page for good products you can substitute in.
How to Assemble your finger
1. If you are using a straw finger, skip to step 4. If using a 3D printed finger, fold your strip of overhead plastic in half and cut a 3 cm long piece on the folded end. This will act as a joint to connect two of your finger parts.
2. Hot glue one end of the folded plastic piece into the tip part of the finger. Then trim your piece of plastic to resemble the size of a human finger joint (about 1cm), make sure to keep in mind that you still have to glue the other end into the middle finger part. Once trimmed to about 1 cm, hot glue the other end to the second finger part.
3. Repeat for the other finger part until all 3 parts are stuck together. (for reference photo scroll to step 5)
4. Thread your fisherman's wire through the holes in the finger, and hot glue the tip of the string to the tip of the finger.
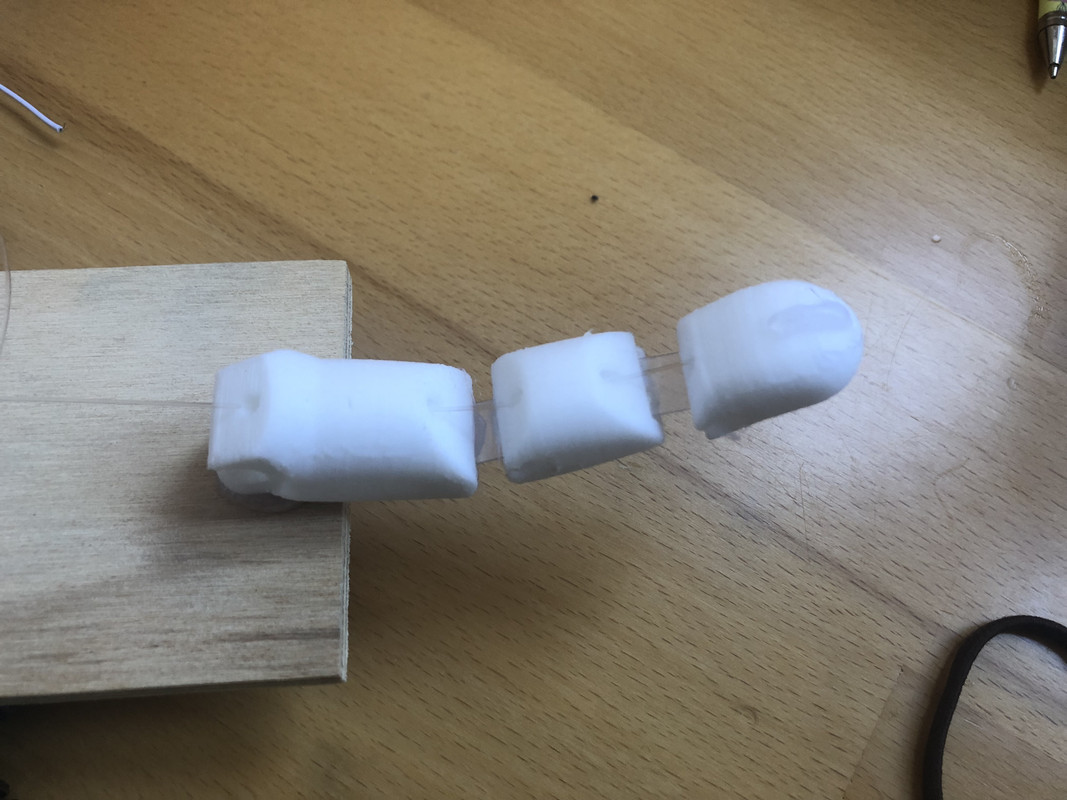
5. Hot glue your threaded finger to the top of your thin wood so it looks like this:

How to Connect all the Components on the circuit board.
1.Gather your Adruino Nano, flex sensor, micro servo, and usb cable.
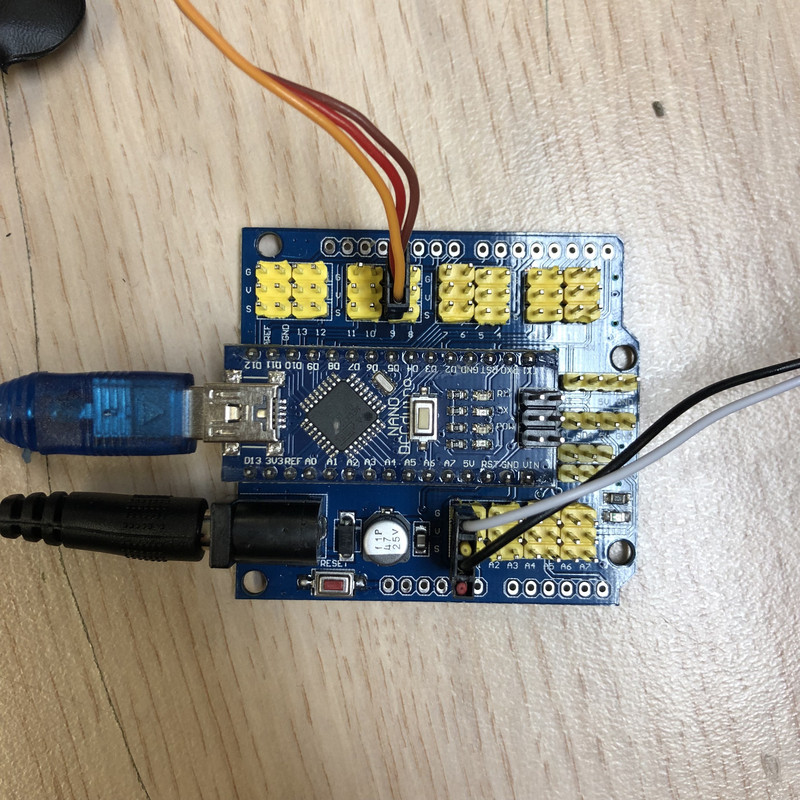
2. Attach your flex sensor to pin A0 on your nano.
3. Attach your micro servo to pin 9 on your nano. (It is important to remember what pins you attach your extensions to as we will need to connect them through code later)
4. Plug in your USB cable to your laptop and connect it to your nano, you should see a few lights turn on on your nano. It should end up looking like this:

How to Assemble it All
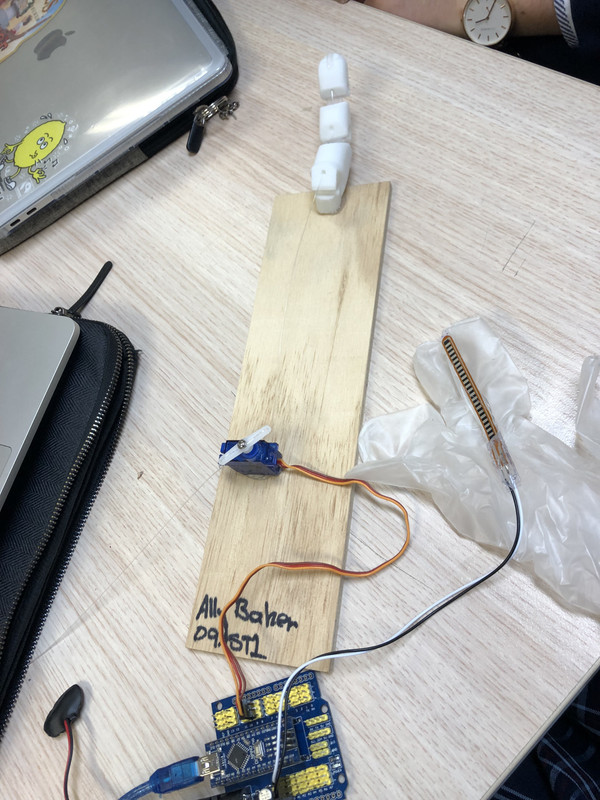
1. Get the end of the fisherman's wire that is not attached to your finger and thread it through the holes in the servo horn (the part on top that spins) and leave about 10-20cm of slack between the finger and the micro servo, make usre it is not tied too tight as then your finger will struggle to bend. See the below picture to compare yours against.
2. Once you have tied off your wire onto the micro servo and left some slack between it and your finger, hot glue your servo onto your block of wood where you measured out the slack like so:

How to Code your finger
Below is the code you will need to make your finger move.
//Include Servo library
#include
Servo myservo; // create servo object to control a servo
void setup() {
myservo.attach(9); // attaches the servo on pin 9 to the servo object
// Configure flex sensor pin
pinMode(A0, INPUT_PULLUP);
Serial.begin(9600);
}
void loop() {
int flexSensor = analogRead(A0); // Set the pin to plug your flex senor in to
int angle = (flexSensor - 425) / 1;
Serial.println(angle);
myservo.write(angle); // set servo position
}
If this code does not work, you want to know what each of these lines of code means, or you generally want to know more about this code, check out this youtube video and you can copy the code from that and it will work.
Once you have either copied and pasted or typed this code into the Arduino Program, plug your nano into your laptop and click the upload button. Don't forget to make sure you have the correct port and board selected (the port would be your laptop and the board would be Arduino Nano). If you have trouble with any of this, you can visit the arduino website here